Why DIY Wooden Driveway Gate Plans Are Your Best Home Improvement Investment

DIY wooden driveway gate plans provide everything you need to build a custom gate that improves security, boosts curb appeal, and saves money compared to professional installation. Here’s what you need to get started:
Quick Start Guide:
- Choose your gate type – Single gate (up to 10′ wide) or double gate (up to 20′ wide)
- Select rot-resistant wood – Cedar, redwood, or pressure-treated pine
- Gather essential tools – Miter saw, drill, level, tape measure
- Follow proven plans – Frame construction, diagonal bracing, proper hardware installation
- Install with confidence – Set posts in concrete, attach hinges, add finishing touches
Whether you’re keeping pets safe, preventing unwanted traffic, or adding a finishing touch to your driveway, building your own wooden gate is a surprisingly achievable project.
The cost difference is striking. While professional installation can be expensive, a DIY gate costs only a fraction of that in materials, offering significant savings for a weekend project.
Building your own gate also means you get exactly what you want—the perfect width, height, and style to match your home’s aesthetic. Plus, wooden gates are easier to repair than metal ones. If a board gets damaged, you can simply replace that piece rather than the entire structure.
With the right plans, materials, and a systematic approach, even intermediate DIYers can create a professional-looking gate that will last for years.

Planning Your Perfect Wooden Gate
Proper planning is the key to a successful DIY project. An hour spent here can save days of frustration later. First, consider gate placement. Position it far enough from the road (an 80-foot setback is a good rule of thumb) so your vehicle can be completely off the street while the gate opens.
Next, measure your driveway width. Most residential gates are 9 to 12 feet wide. For a 14-foot opening, consider building a 15-foot gate to give yourself extra “wiggle room.” This measurement determines if you need a single or double gate. For openings wider than 10 feet, a double gate is recommended. Two smaller leaves are easier to manage and less prone to sagging. For a 15-foot opening, you’d build two 90-inch-wide gates.
Gate height is a blend of aesthetics and function. A height of 4 feet is common and looks proportional, while 5 or 6 feet offers more privacy. Be mindful that a very tall gate can overwhelm your property’s look. The gate should complement your home, not dominate it. If you’re looking for a unique design, we can help you create custom gates that match your vision. More info about custom gates
Choosing the Right DIY Wooden Driveway Gate Plans
The right plans can transform your entrance. Here are a few popular styles:
- Rustic Farmhouse: Features natural wood tones, classic X-bracing, and simple panel designs. Feather edge cladding is a popular and charming choice for this look.
- Modern Horizontal Slat: Clean, contemporary lines created with horizontal boards. Use tongue and groove wood for a seamless finish, with spacing customized for privacy.
- Classic Picket: A timeless style that defines your space without feeling closed off. Variations like Newport or Hyde Park add character with decorative tops.
- Privacy Panel: Offers maximum seclusion with solid panels or tightly spaced boards. Designs like Cape Cod and Maine Board are inherently strong and make a bold statement.
Beyond these, you can find specialized designs like Double ‘V’ Rail, Five Bar Mortise & Tenon, or Weldon Barrier styles. The beauty of DIY is the ability to customize your gate to be as unique as your home. For more inspiration, check out this collection of gate designs. Inspiration for gate designs
Gathering Your Materials and Tools
Setting up your workspace with all the necessary tools and materials makes the building process smoother and more enjoyable.
For your diy wooden driveway gate plans, you’ll need a solid tool collection. Key items include a tape measure, combination square, and spirit level for accuracy. For cutting, a miter saw or circular saw is essential. A combi drill and impact driver are necessary for fastening, and a post auger will save your back when digging post holes. An orbital sander and hammer complete the basic toolkit.
For materials, you’ll need your chosen lumber for the frame and cladding, plus ground-contact rated pressure-treated lumber for the posts. Gather wood screws, galvanized nails, carriage bolts, and waterproof wood glue. For setting posts, you’ll need concrete mix and gravel. Finally, pick up wood stain or sealer and optional post caps for a finished look.
The Best Wood for Your Outdoor Gate
The wood you choose impacts your gate’s longevity, maintenance, and weight.
- Cedar is a top choice because it naturally resists rot and insects. It’s also lightweight, which helps prevent sagging.
- Redwood is similar to cedar in its natural resistance to decay and insects and is prized for its rich color.
- Pressure-treated pine is incredibly durable against rot and insects due to chemical treatment, making it the best choice for posts that will have ground contact. Allow it to acclimate for 72 hours before building.
For a deeper dive into wood choices, check out our guide on Cedar vs Redwood Fence: The Ultimate Guide to Wood Durability.
| Wood Type | Durability & Resistance | Weight | Best Use |
|---|---|---|---|
| Cedar | Excellent natural rot & insect resistance | Lightweight | Gate frames & cladding |
| Redwood | Excellent natural rot & insect resistance | Moderate | Gate frames & cladding |
| Pressure-Treated | Chemically treated for rot, fungi & insect resistance | Heavy | Gate posts (ground contact) |
Essential Gate Hardware
Good hardware is the difference between a gate that swings smoothly for years and one that sags. Don’t cut corners here.
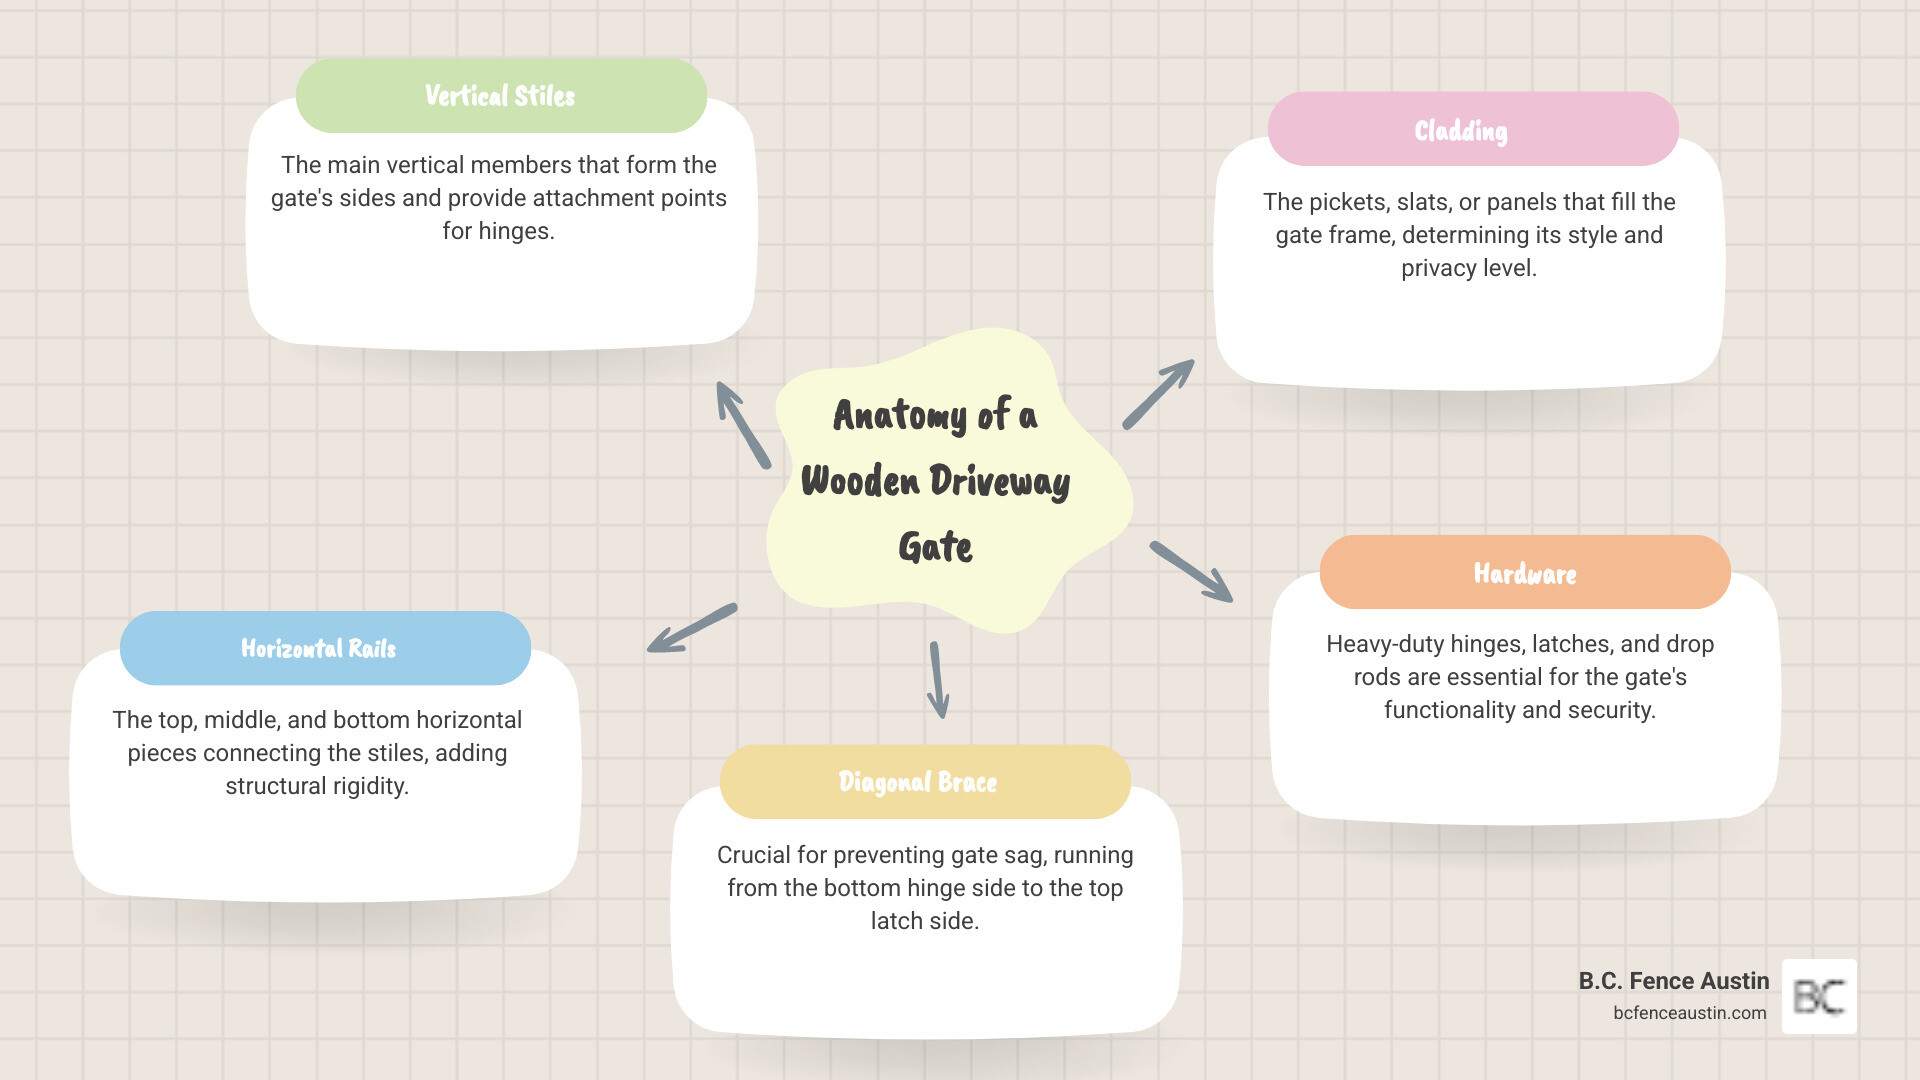
- Hinges: Heavy-duty hinges are critical. Options include extra heavy auto close gate hinge sets, traditional hook and pin hinges, or double strap hinges, which are excellent for preventing sag. Example of a heavy-duty hinge set
- Latches: Your choice depends on style and function. A simple black gate latch is reliable, while a Suffolk thumb latch adds traditional charm. For security, a slide bolt gate latch is a robust option. Example of a gate latch
- Drop Rods: For double gates, drop rods or cane bolts are non-negotiable. They secure one gate leaf to the ground, providing stability. A lockable mammoth cane bolt offers improved security. Example of a cane bolt
- Fasteners: Always use galvanized or exterior-grade screws and bolts to prevent rust. Carriage bolts are perfect for securing frame intersections where strength is paramount.
Your Step-by-Step Guide to Building with DIY Wooden Driveway Gate Plans
With your diy wooden driveway gate plans and materials ready, it’s time to build. First, prepare the site by clearing debris and ensuring good drainage. Crucially, check for underground utilities before digging. Also, review local building codes or HOA rules regarding gate height and placement to ensure legal compliance. A quick check now can prevent major issues later. For more on this topic, see our guide: Fence Installation Legal Facts: Know Before You DIY
Step 1: Installing Your Gate Posts
Your gate posts are the foundation; they must be rock-solid.
- Measure and Mark: Precisely mark your post locations, accounting for the gate width, post width, and a half-inch to one-inch clearance gap on each side.
- Dig Holes: Dig holes at least three feet deep. In cold climates, dig below the frost line. Add six inches of gravel at the bottom for drainage.
- Set Posts in Concrete: Place your ground-contact rated post in the hole. Fill with concrete, stopping a few inches below ground level.
- Plumb and Brace: Use a level to ensure the post is perfectly vertical (plumb). Brace it securely so it doesn’t move while the concrete sets.
- Cure: Wait at least 72 hours for the concrete to cure fully before hanging the gate. This step is critical for long-term stability.
Step 2: Building the Gate Frame
While the posts cure, build the gate frame on a flat surface like a garage floor.
- Cut Rails and Stiles: Cut the horizontal rails and vertical stiles to size according to your plans. Use sturdy lumber, like 2x4s for the top and sides and a 2×8 for the bottom rail.
- Assemble the Frame: Use strong joinery like pocket holes and screws or half-lap joints. Apply weatherproof wood glue at all joints before fastening for maximum strength.
- Check for Squareness: Measure the two diagonal corners of the frame. The measurements must be identical. If they aren’t, adjust the frame until it’s perfectly square before the glue dries. A square frame is essential to prevent sagging.
Step 3: Adding Cladding and Hanging the Gate
Now, turn your frame into a finished gate.
- Attach Cladding: Secure your pickets, slats, or panels to the frame using exterior-grade screws or galvanized nails. Use a spacer to ensure even gaps. It’s best to attach all cladding before hanging the gate.
- Sand: Smooth any rough edges with 120-grit sandpaper for a clean finish and to prevent splinters.
- Attach Hinges: Mount the heavy-duty hinges to the gate frame, typically near the top and bottom rails. Pre-drill pilot holes to prevent the wood from splitting.
- Hang the Gate: This is a two-person job. Use temporary blocks to prop the gate at the desired height (usually 2-4 inches off the ground). Once level, mark the hinge locations on the post, drill pilot holes, and secure the hinges.
- Install Latch: Mount your latch and any drop rods for double gates according to the manufacturer’s instructions. For more details on gate installation, see our guide: More on wood fence gates
Building for Strength: How to Prevent Gate Sag
The arch-nemesis of any wooden gate is sag. Thankfully, it’s preventable with smart design and construction.

The diagonal brace is your best defense against gravity. It transfers the gate’s weight from the unsupported outer corner back to the sturdy, hinged post. For this to work, proper brace orientation is non-negotiable. The brace must run from the bottom hinge side up to the top latch side. This orientation puts the brace in compression, effectively pushing up against the gate’s weight and preventing it from drooping.
Strong joinery, like glued and screwed half-lap joints, also forms the backbone of a sag-resistant gate. Using carriage bolts at major intersections adds another layer of reinforcement, creating a structure that can handle years of use.
Reinforcing Your Gate with an Anti-Sag Kit
For extra insurance on heavy or wide gates, consider an anti-sag kit. This system uses a tension cable and turnbuckle that runs diagonally opposite to your wooden brace (from the top hinge side to the bottom latch side).
While the wood brace pushes up, the cable pulls up, creating a dual-support system. The turnbuckle allows you to fine-tune the tension, lifting the unsupported corner and keeping the gate perfectly level over time. If you notice any settling years later, a few turns of the turnbuckle can bring it back into alignment. Example of an Anti-Sag Gate Kit
Common Mistakes to Avoid with DIY Wooden Driveway Gate Plans
Learning from common pitfalls will save you time and frustration. Avoid these mistakes:
- Inadequate Posts: Using posts that aren’t deep enough, aren’t set in concrete, or aren’t rated for ground contact will lead to failure.
- Weak Frame Joints: Simple butt joints won’t hold up. Use stronger methods like pocket holes or half-lap joints with waterproof glue.
- Incorrect Bracing: A brace running from top-hinge to bottom-latch will pull the gate down, making sag worse. Always brace from bottom-hinge to top-latch.
- Using the Wrong Hardware: Standard fence hinges can’t support the weight of a driveway gate. Always use heavy-duty hardware rated for large gates.
- Skipping the Finish: Unprotected wood will rot, warp, and fade. Always apply a quality exterior stain or sealant.
- Not Checking for Squareness: An out-of-square frame will never hang or operate correctly. Measure your diagonals during assembly.
Finishing, Maintenance, and Upgrades
Your gate is built, but the job isn’t done. The final steps are crucial for ensuring it lasts for years to come.

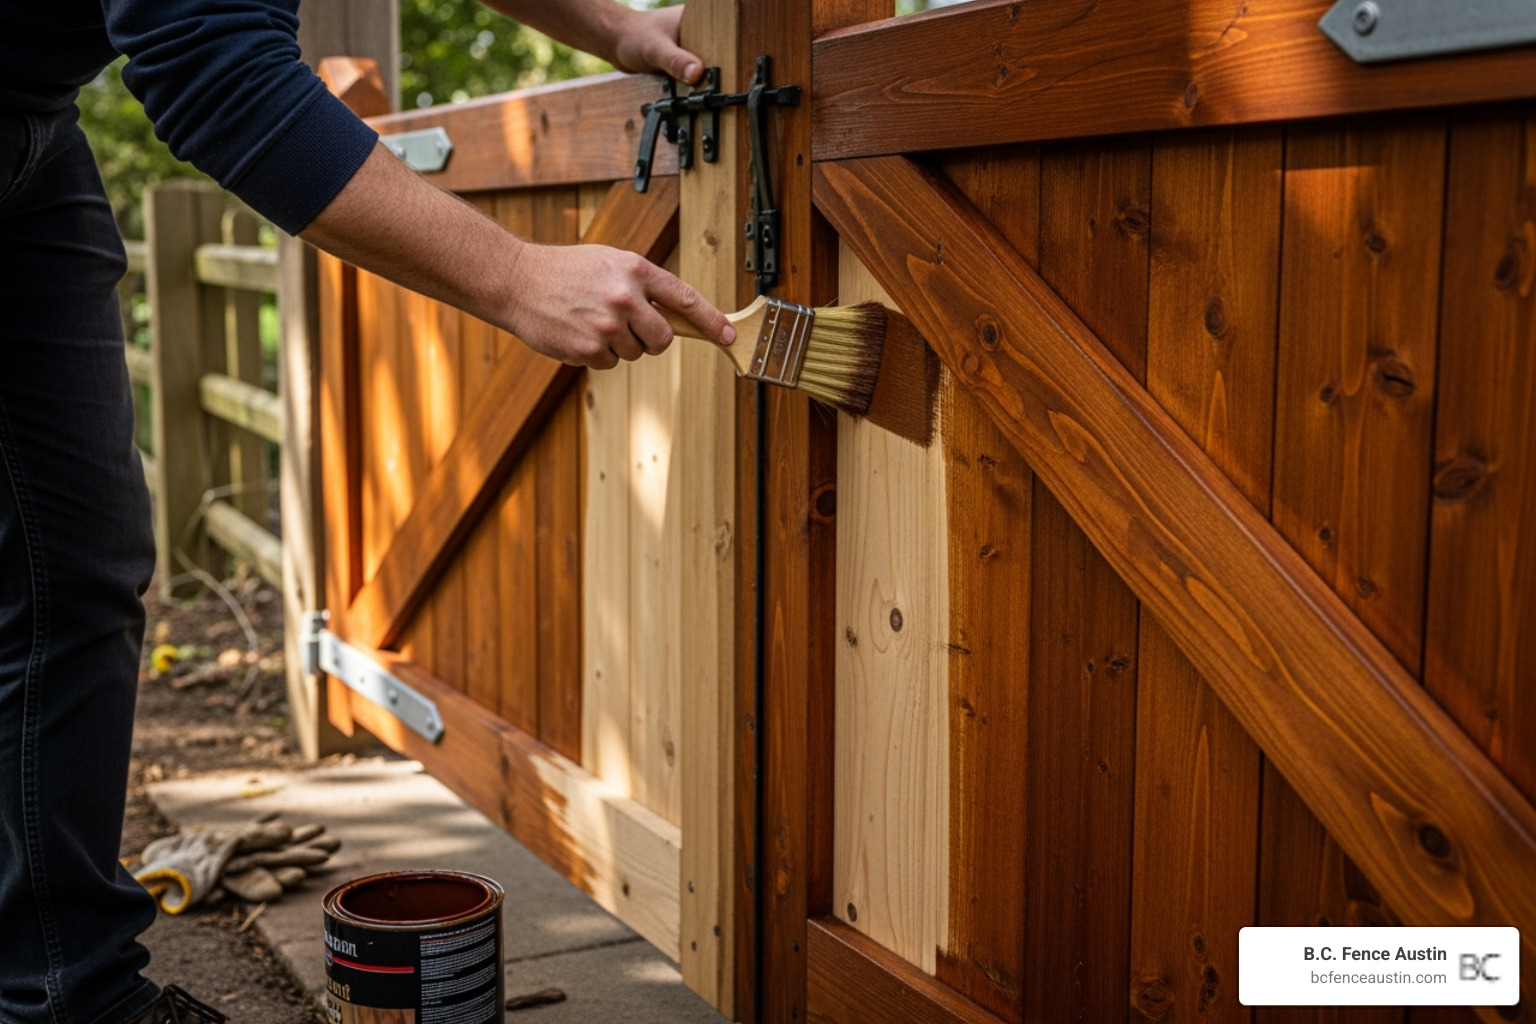
Protecting the wood from the elements is essential for longevity. A quality exterior stain or sealant creates a barrier against moisture, which causes rot, and blocks UV rays that lead to graying and splintering. This step is a must for your diy wooden driveway gate plans, especially in areas with harsh weather. For help deciding between paint and stain, our guide offers valuable insights: Should I Paint or Stain My Wood Fence?
Protecting and Maintaining Your Gate
A little ongoing attention will keep your gate in top condition. Add these tasks to your annual home maintenance routine:
- Apply Stain or Sealant: Reapply a protective finish every 2-3 years to maintain the barrier against weather.
- Regular Inspections: Periodically check for loose screws, splintering wood, or a thinning finish. Catching issues early prevents major repairs.
- Lubricate Hardware: Annually apply a silicone-based spray to hinges and latches to keep them moving smoothly and prevent rust.
- Cleaning Procedures: A few times a year, wash the gate with mild soap and water. Avoid using a pressure washer, as it can damage the wood and its protective finish. For more tips, see our guide on Wood Fence Maintenance Tips.
Optional Upgrades and Features
Take your gate from functional to exceptional with a few thoughtful upgrades.
- Automatic Gate Openers: The ultimate convenience, especially solar-powered options that don’t require running electrical lines.
- Integrated Lighting: Solar post caps or low-voltage lighting improve security and add beautiful nighttime curb appeal.
- Decorative Hardware: Ornate hinge straps, unique latches, or custom handles can add a personal touch that reflects your home’s style, without compromising on strength.
Frequently Asked Questions about Building Driveway Gates
Here are answers to some common questions that arise when working with diy wooden driveway gate plans.
How wide should a residential driveway gate be?
Most residential driveway gates are 9 to 12 feet wide. For a double gate, each leaf would be 4.5 to 6 feet wide. However, always measure your specific driveway and consider the types of vehicles you use. It’s often wise to add a little extra width for easier maneuvering.
What is the best way to anchor gate posts?
The gold-standard method is setting posts in concrete. Dig holes at least 3 feet deep (or below your local frost line), add a gravel base for drainage, and fill with concrete. Most importantly, ensure the post is perfectly plumb (vertical) and allow the concrete to cure for at least 72 hours before hanging the gate.
Can I attach a gate to my house or an existing column?
Yes, you can attach a gate to a solid, structural element like a house wall or a masonry column. To do this, securely fasten a sturdy mounting board (like a 2×6) to the structure using appropriate masonry screws or lag bolts. Then, hang your gate hinges from this board. This distributes the gate’s weight and is much stronger than attaching hinges directly to the masonry.
Your Gateway to Improved Curb Appeal
You’ve done it! Building a gate with diy wooden driveway gate plans is a rewarding project that offers lasting benefits. Every time you arrive home, you’ll feel a spark of pride in what you’ve created.
You’ve mastered fundamental carpentry skills, from setting posts to building a sag-proof frame. Beyond personal satisfaction, your property is now more secure, your pets are safer, and your home’s curb appeal has skyrocketed. A quality wooden gate is a smart investment that can significantly increase your property value.
The best part of DIY is that you created a gate that perfectly fits your needs and style, with no compromises.
Of course, not everyone has the time or tools for such a project. For those in the Austin area who prefer a professional touch, B.C. Fence Austin offers expert installation of custom wooden gates and fences. Our team ensures your property gets the high-quality, beautiful gate it deserves, without you lifting a finger. Explore our wooden fence services
Whether you build it yourself or call in the pros, a well-crafted wooden gate is a true asset to your home.

